AutoHotkey | Android | Arduino | COMM140 | Fractals | Grammar Checkers | Knots | A Million Dots Activity | Processing | Processing for Scratch Users | Redbubble | Tutorials | Weather | World Time Meeting Planner | Favicon Generator.
Home > Tutorials > Auduino > Arduino UNO Demo > Tutorial for the Interactive Book Project
Home > COMM140 >Tutorial for the Interactive Book Project
Start with the basics.
1) If you need to download and install the Adruino IDE Integrated Development Environment from https://www.arduino.cc/en/Main/Software
Once you have downloaded and installed the software:
2) Connect the Arduino to the computer
3) Run the Adruino IDE
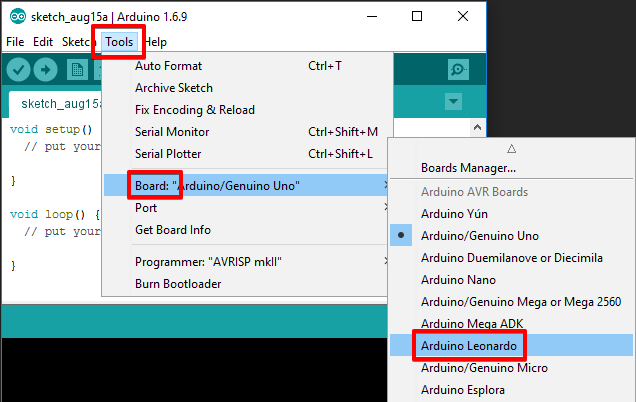
4) Select the correct board type within the IDE for this example I am using an Arduino Leonardo
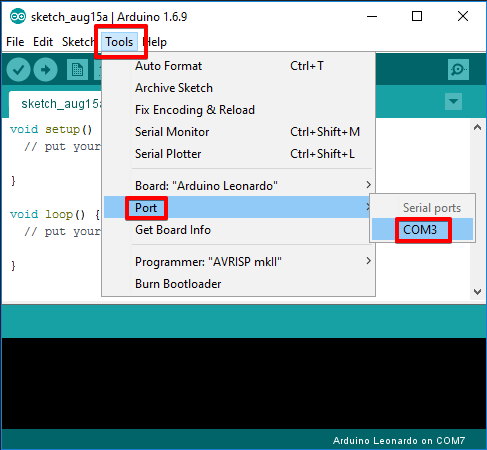
5) Identify and select the correct COM port
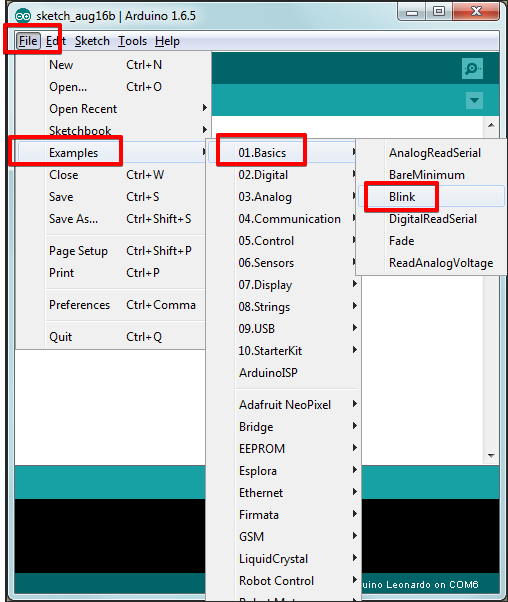
6) Load the example Blink program.
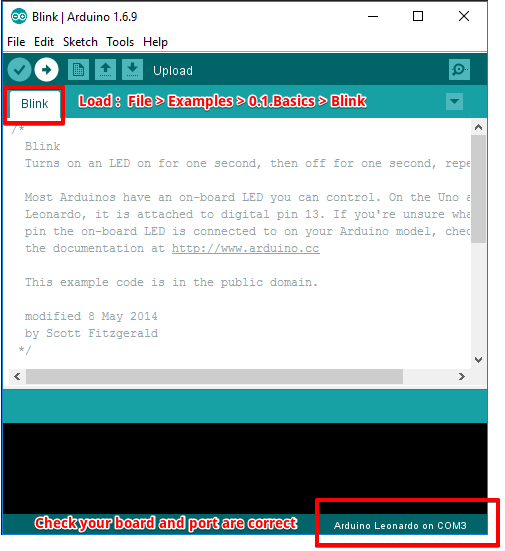
7) Upload the progam and make sure the Arduino in blinkng on and off every second
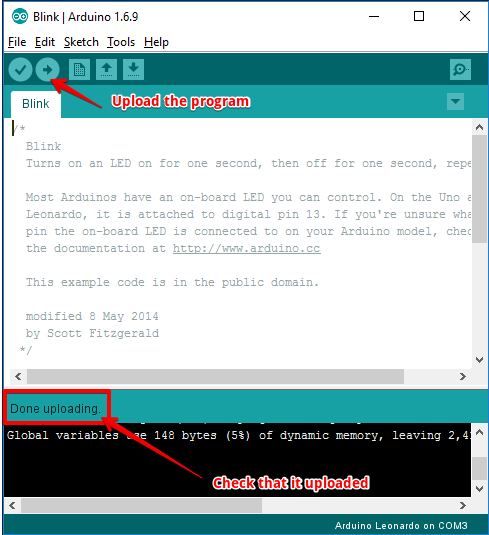
8) Check that the board it working properly
blink from rupert.russell on Vimeo.
Once we are happy that we can talk to the board and that it is running properly we can tank the next step
which is this case is to connect 2 switches and demonstrate that we can read the stwitchs and respon to them being pressed.
This demo reads the "page number" from the keypad and changes the colour of the NeoPixel Jewel depending on which page you are reading.
Load the Keypad Library into the Arduino IDE
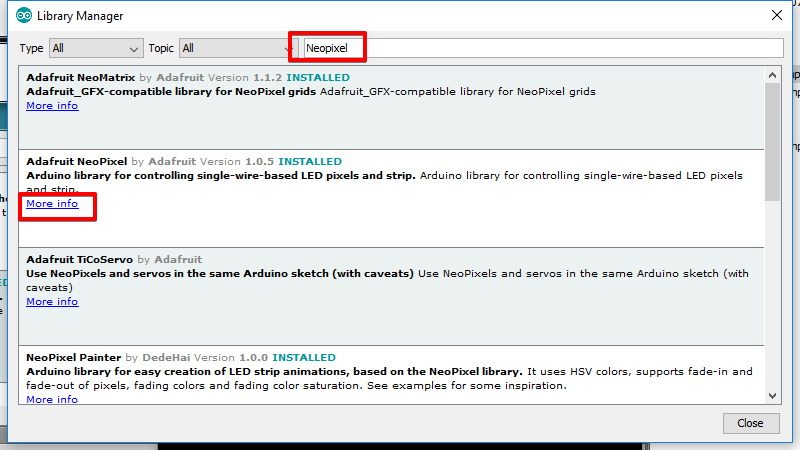
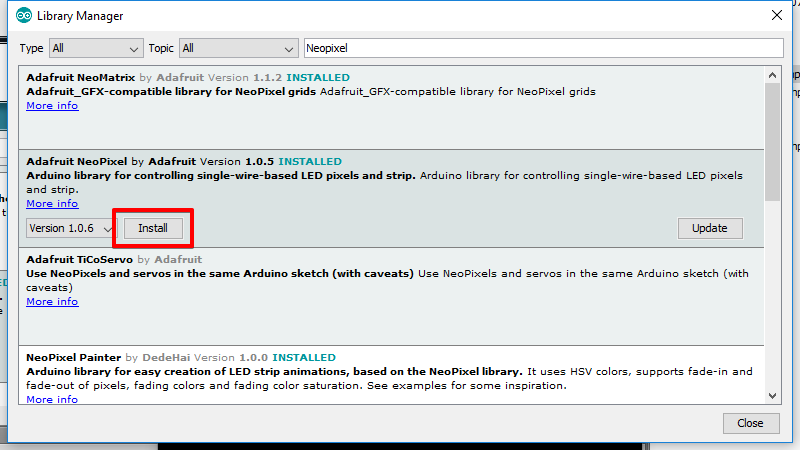
Sketch > Include Library > Manage Libraries...
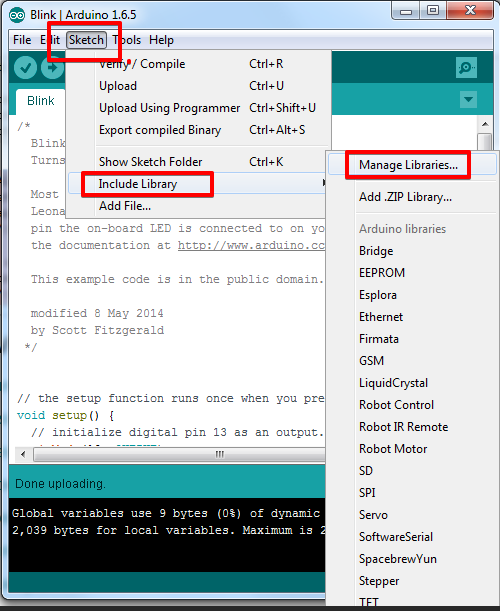
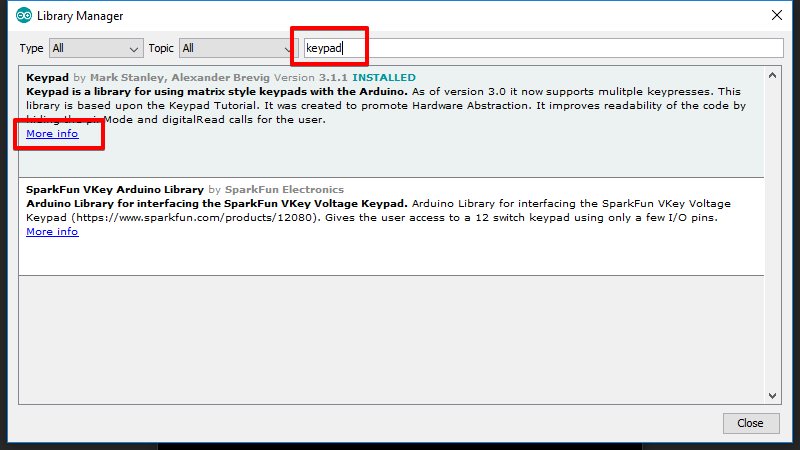
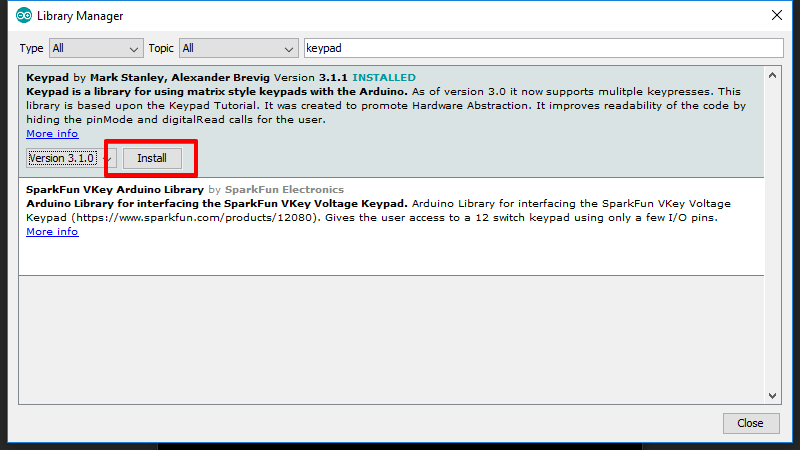
Search for Keypad > More info > Install the library
Search for Neopixel and insall the library
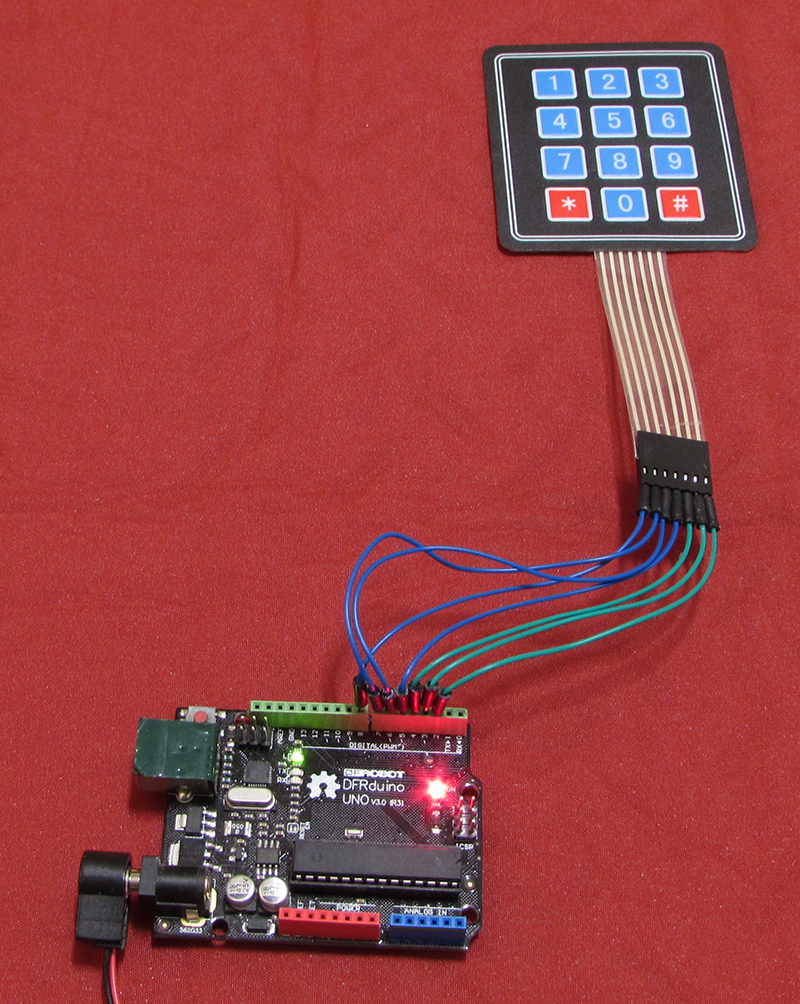
Connect the Keypad to the Artduino

connect to the Arduino to match this image
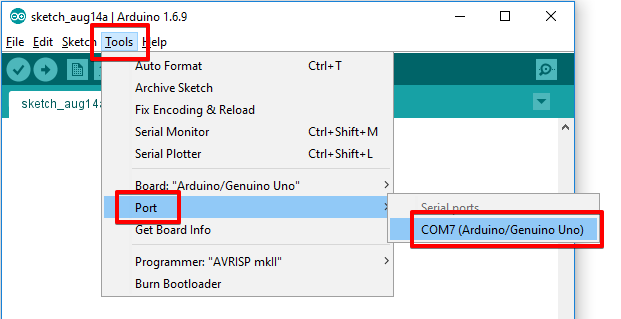
Connect the Arduino to the PC and select the correct board. In this case we are using a UNO

Next find the Port number and select it In this example it is port COM7 you will most likley
have anotehr port number
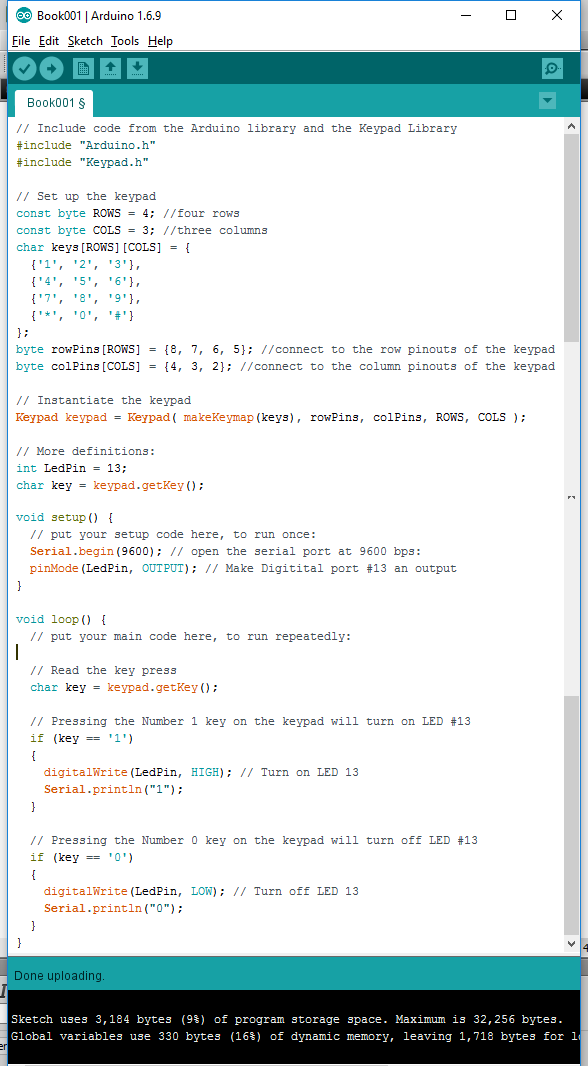
// Include code from the Arduino library and the Keypad Library
#include "Arduino.h"
#include "Keypad.h"
// Set up the keypad
const byte ROWS = 4; //four rows
const byte COLS = 3; //three columns
char keys[ROWS][COLS] = {
{'1', '2', '3'},
{'4', '5', '6'},
{'7', '8', '9'},
{'*', '0', '#'}
};
byte rowPins[ROWS] = {8, 7, 6, 5}; //connect to the row pinouts of the keypad
byte colPins[COLS] = {4, 3, 2}; //connect to the column pinouts of the keypad
// Instantiate the keypad
Keypad keypad = Keypad( makeKeymap(keys), rowPins, colPins, ROWS, COLS );
// More definitions:
int LedPin = 13;
char key = keypad.getKey();
void setup() {
// put your setup code here, to run once:
Serial.begin(9600); // open the serial port at 9600 bps:
pinMode(LedPin, OUTPUT); // Make Digitital port #13 an output
}
void loop() {
// put your main code here, to run repeatedly:
// Read the key press
char key = keypad.getKey();
// Pressing the Number 1 key on the keypad will turn on LED #13
if (key == '1')
{
digitalWrite(LedPin, HIGH); // Turn on LED 13
Serial.println("1");
}
// Pressing the Number 0 key on the keypad will turn off LED #13
if (key == '0')
{
digitalWrite(LedPin, LOW); // Turn off LED 13
Serial.println("0");
}
}
Basic Keypad input and Output on an Arduino from rupert.russell on Vimeo.
Next we add the
https://learn.adafruit.com/adafruit-neopixel-uberguide
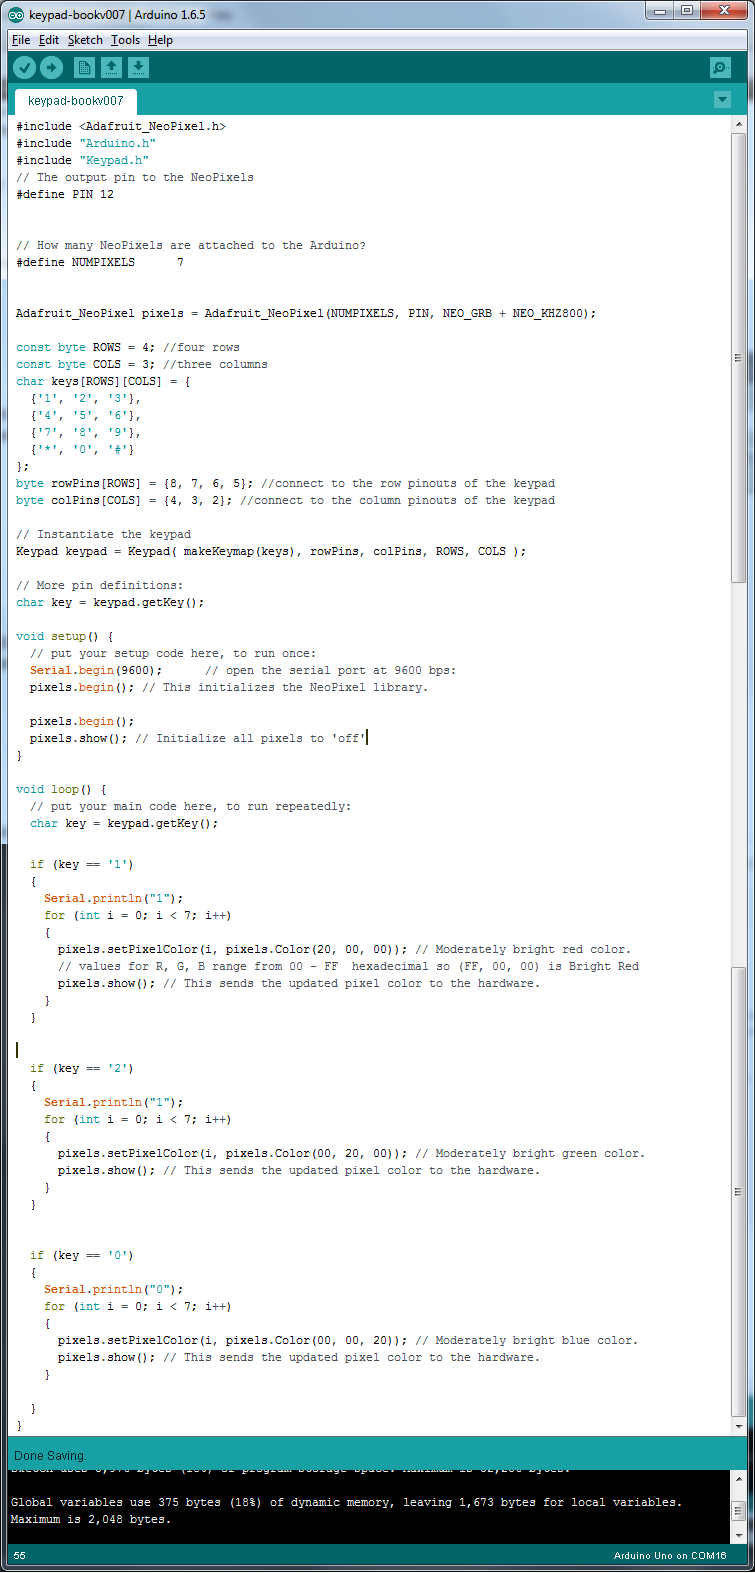
The following example program switches the colour of the Jewel
depending on what key on the keypad is pressed.
#include <Adafruit_NeoPixel.h>
#include "Arduino.h"
#include "Keypad.h"
// The output pin to the NeoPixels
#define PIN 12
// How many NeoPixels are attached to the Arduino? There are 7 Neopixels in the Jewel
#define NUMPIXELS 7
Adafruit_NeoPixel pixels = Adafruit_NeoPixel(NUMPIXELS, PIN, NEO_GRB + NEO_KHZ800);
const byte ROWS = 4; //four rows
const byte COLS = 3; //three columns
char keys[ROWS][COLS] = {
{'1', '2', '3'},
{'4', '5', '6'},
{'7', '8', '9'},
{'*', '0', '#'}
};
byte rowPins[ROWS] = {8, 7, 6, 5}; //connect to the row pinouts of the keypad
byte colPins[COLS] = {4, 3, 2}; //connect to the column pinouts of the keypad
// Instantiate the keypad
Keypad keypad = Keypad( makeKeymap(keys), rowPins, colPins, ROWS, COLS );
// More pin definitions:
char key = keypad.getKey();
void setup() {
// put your setup code here, to run once:
Serial.begin(9600); // open the serial port at 9600 bps:
pixels.begin(); // This initializes the NeoPixel library.
pixels.begin();
pixels.show(); // Initialize all pixels to 'off'
}
void loop() {
// put your main code here, to run repeatedly:
char key = keypad.getKey();
if (key == '1')
{
Serial.println("1");
for (int i = 0; i < 7; i++)
{
// loop through the next 2 lines of code 7 times 0 to 6
// change the colour of each pixel (i = 0 to 6) to a (R, G, B) colour of (20, 00, 00)
pixels.setPixelColor(i, pixels.Color(20, 00, 00)); // Moderately bright red color.
pixels.show(); // This sends the updated pixel color to the hardware.
}
}
if (key == '2')
{
Serial.println("2");
for (int i = 0; i < 7; i++)
{
pixels.setPixelColor(i, pixels.Color(00, 20, 00)); // Moderately bright green color.
pixels.show(); // This sends the updated pixel color to the hardware.
}
}
if (key == '0')
{
Serial.println("0");
for (int i = 0; i < 7; i++)
{
pixels.setPixelColor(i, pixels.Color(00, 00, 20)); // Moderately bright blue color.
pixels.show(); // This sends the updated pixel color to the hardware.
}
}
}
Book Example 002 from rupert.russell on Vimeo.
/*
as well as the Outputs to the FX board |