 Becomes
AutoHotkey | Android | Arduino | COMM140 | Fractals | Grammar Checkers | Knots | A Million Dots Activity | Processing | Processing for Scratch Users | Redbubble | Tutorials | Weather | World Time Meeting Planner | Favicon Generator.
Home > Processing > Processing - Merging layers
Have you ever wanted to take two layers in Processing and merge them into a composite image.
Well like most things it's simple enough when you know how.
Thanks to H. ADAM LENZ for his tutorial page PIXEL PUSHING WITH PROCESSING
The fist step in understanding this process is to understand that when loading an image into processing what you are doing is loading an array of pixels. And that we can address any individual pixel on the screen by addressing the pixel data held in an array.
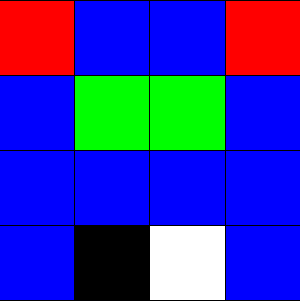
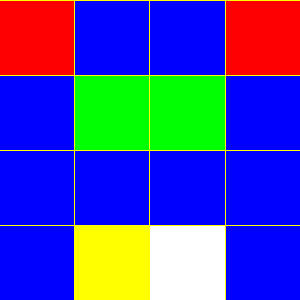
See below for an example of using this technique to look up pixel values and change them, IN this case from Black to Yellow.
Processing is an open source programming language and environment for people who want to create images, animations, and interactions. Initially developed to serve as a software sketchbook and to teach fundamentals of computer programming within a visual context, Processing also has evolved into a tool for generating finished professional work. Today, tens of thousands of students, artists, designers, researchers, and hobbyists who use Processing for learning, prototyping, and production.
// https://hadamlenz.wordpress.com/2014/07/21/pixel-pushing-with-processing/ PImage img; //declare the image color checkColor = color(#000000); //the color to check for //pixel array method |
 Becomes
All black pixels are replaced with yellow ones
The next example uses the PGraphics to create 2 layers and then merges the layers together
// Merging 2 layers in Processing // Create 2 layers pg1 & pg2 PGraphics pg1; void setup() {
void draw() { // Draw the "background" //pixel array method for searching for one colour and replacing it with another //loop through all the pixels //if the current pixel is black { pg1.save("pg1b.gif"); // save the resultant image
|
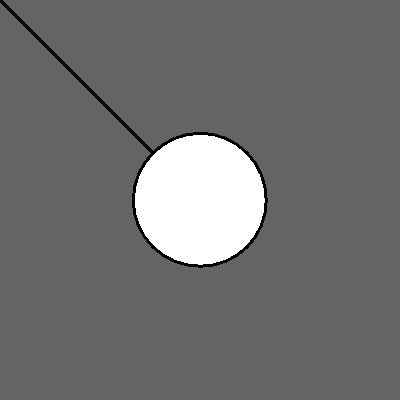 The Foreground layer the white in this image will become "Transparent"
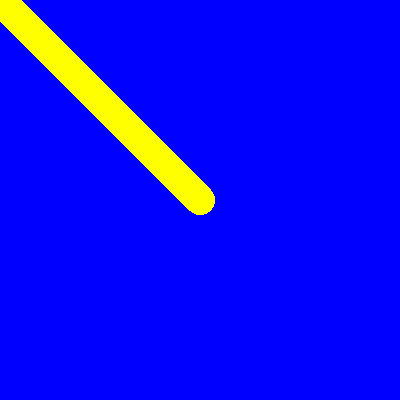 The background image
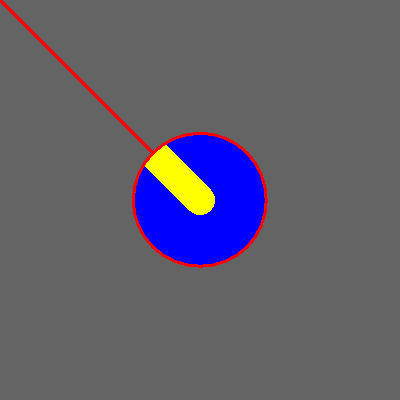 The final result.
Note we have performed 2 actions first we replaced all black pixels with red ones
then we returned the pixels from the background layer instead of keeping the original white pixels. So we see the background "trough" the white circle
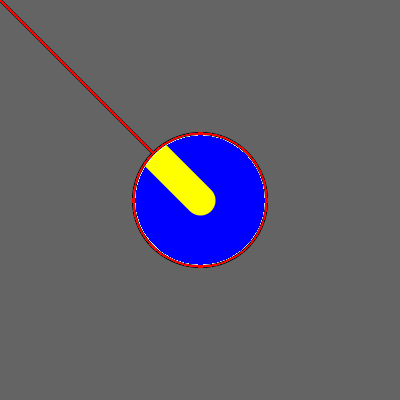
Note if we turn smooth(); on the result is not as successful because the search we performed were for pure black and pure white pixels as you can see below there is a "halo" of almost white and almost black pixels around the edges.
I have not considered the best way to deal with this yet but it will require searching for a range of almost white and almost black pixels and replacing them.
APA citation:
Russell, R. (2017, January 15, 12:26 am). Processing code snippits.
Retrieved January 13, 2026, from
http://www.rupert.id.au/processing/snippits.php
Last refreshed: January 13 2026. 09:44.22 pm
 This work is licensed under a Creative Commons Attribution-NonCommercial-ShareAlike 2.5 License.