According to there site CutePDF Writer allows you to:
Create professional quality PDF files from almost any printable document. FREE for personal and commercial use! No watermarks! No popup Web advertisements!
1. Installation
Please note: You may require administrator access to your computer to install CutePDF.
Installing CutePDF Writer is a 2 step process. The first step is to install a Post Script to PDF converter. The recommended program is Ghostscript converter.exe there is a copy on this CD-ROM
Once you have downloaded Ghostscript converter locate the file converter.exe and run it.
GNU Ghostscript is an open-source interpreter for the PostScript language and the PDF file format. It is distributed under the GNU General Public License. You may obtain the source code for GNU Ghostscript from http://www.gnu.org/order/ftp.html.
When you run converter.exe simply click the Setup button and it should install in a few seconds with no further action required.
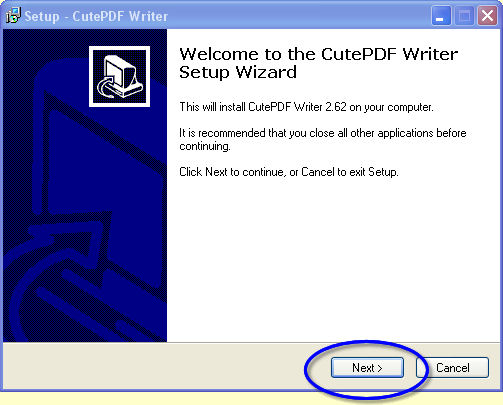
Having installed converter.exe the next setup is to install CutePDF Writer. Locate the file CuteWriter.exe on the CD-ROM or download a copy and run it.
1) Click Next >
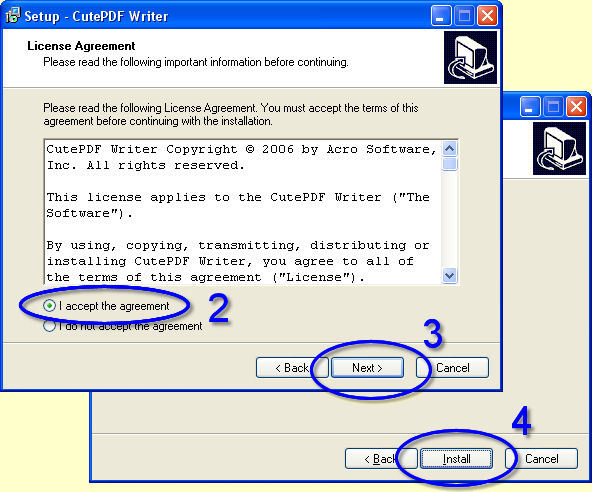
2) Select I accept the agreement
3) Click Next >
4) Click Install after 1 -2 minutes depending on the speed of you machine
the installation process should open up the CutePDF Writer read.me file.
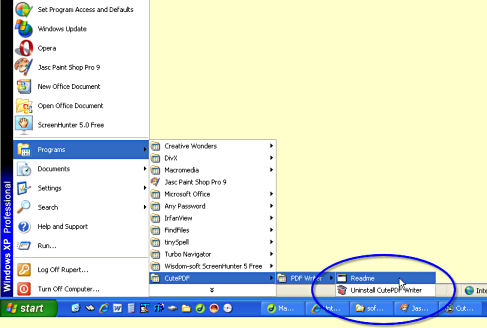
At this point you might expect to find a new program installed on your computer. If you click on the Start Button and navigate to Programs > CutePDF > PDF Writer > all you will find is a link to a Readme file and Uninstall CutePDF Writer. This does not look very promising.
Installing CutePDF Writer does not install a "Program".
What it does is installs a virtual printer
Note: The way that CutePDF Writer works is very clever. It installs a virtual printer on your computer. To use it you simply "Print" from any Windows program to this new printer instead of your default printer. |
2. Creating a PDF file with CutePDF Writer
Overview
Open the file that you would like to print to PDF. Select the Print option (usually found under File > Print), and select "CutePDF Writer" from the list of available printers. You will be prompted to select the destination directory and filename for your output file.
Please note that some applications, such as NotePad, will automatically print to your default printer when you select the Print option. If you want to create PDF file, you may need to change your printer selection within that application before printing the file. This can typically be done from Page Setup.
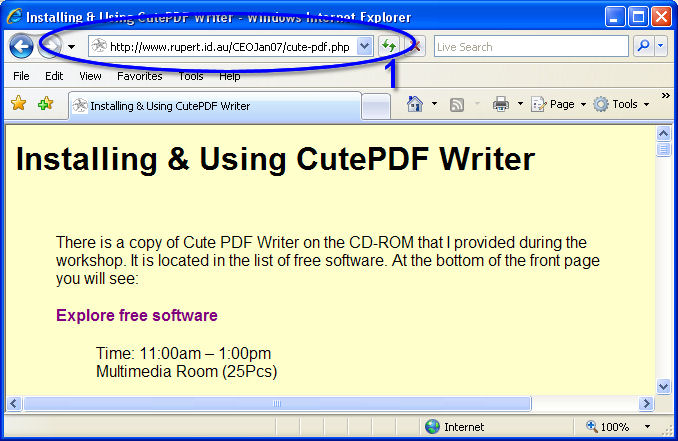
In this example I am going to convert a Web Page to a PDF so I will open Internet Explorer and browse to the web page.
1) Open the document that you wish to convert to PDF
It is a good idea to use the Print Preview... option If your program has one to check that the PDF will look the way you want it.
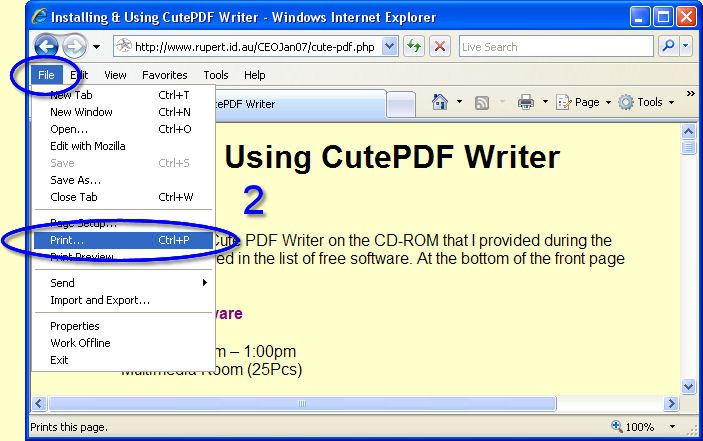
2) Select File | Print... or use the keyboard shortcut CTRL + P
Note: If you are printing from Internet Explorer you may need to press the ALT key to display the menu. Most Windows programs have a Print option within the File Menu.
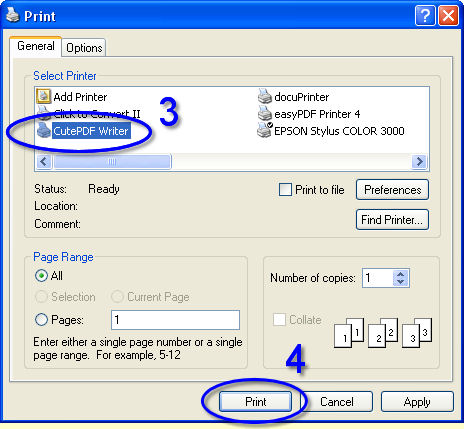
3) Select CutePDF Writer from the list of available printers
4) Press Print
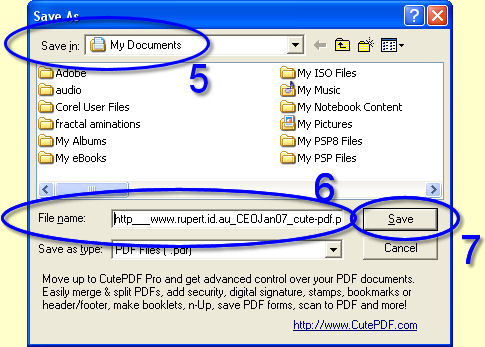
At this point CutePDF Writer will ask you to save your PDF file
5) Select a folder to save the PDF file into. Take careful note of the name of this folder otherwise you will loose your PDF file. (which is when you would use Summation Explorer one of the other free programs on the CD-ROM I handed out to locate your missing file.)
6) Give the file a sensible name something that you will remember. In this example the default file name is way too long. http___www.rupert.id.au_CEOJan07_cute-pdf.pdf
7) Press Save
CutePDF Writer should create your PDF file for you.

