FONTS
GDE
GOOGLE HOME
LINKS
MAPS
MICROWORLDS
TD700-1
TD702
TIMETABLES
TJ501
TJ521
TJ591
TJ641
TJ828
TJ853
TUTORIALS
Home
> Tutorials >
Dreamweaver UltraDev Notes
Dreamweaver UltraDev Notes
Contents:
Creating a new
web page
Editing an existing web page
Floating window
Inserting images
Inserting anchors
Fixing missing images
Making links
Linking
to a file on the J:\ drive
Linking
to a web page on the Web
Linking to anchors
Linking
an image to a file
Creating a new web page
|
1
2
3
|
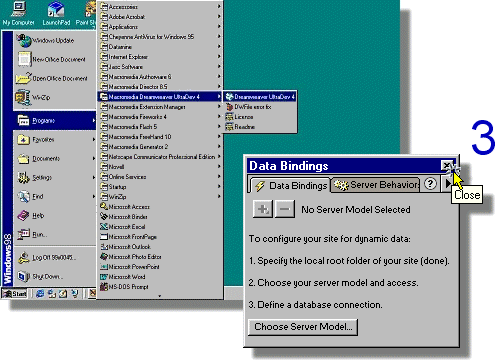
Start Dreamweaver UltraDev 4
Start | Programs | Macromedia Dreamweaver
UltraDev 4| Dreamweaver UltraDev 4
Maximise Dreamweaver 
Close the Data Bindings floating window if it is visible.
|
 |
| 4 |
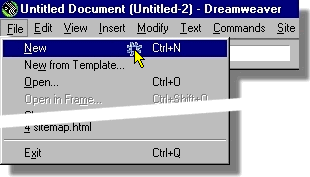
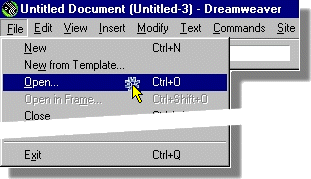
Select File | New
|
 |
| 5 |
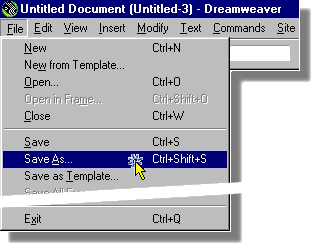
Select File | Save As...
|
 |
|
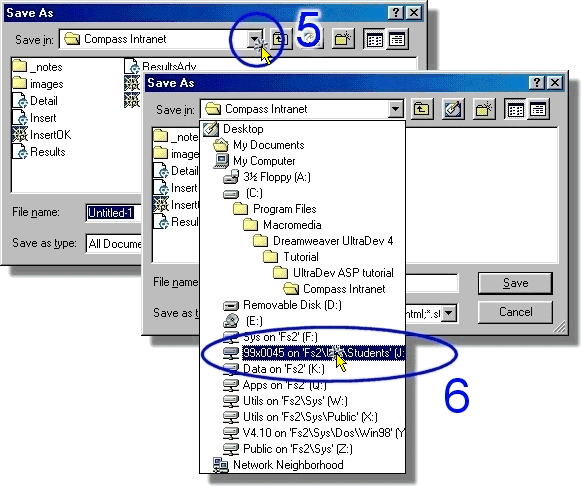
5
6
|
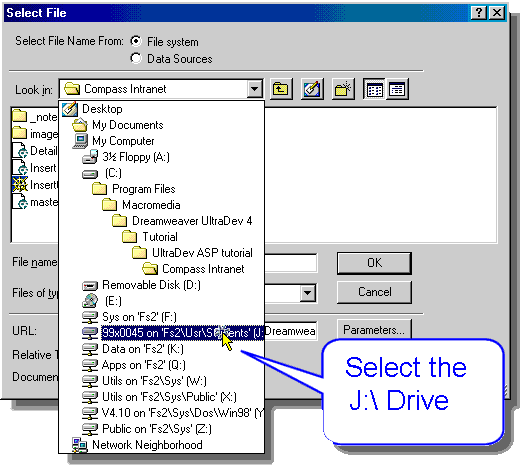
Change to your J:\ drive.
Select J:\ drive from
the list. Note: Drives are listed in alphabetical order. To find your
J:\ drive look for
your student number.
|
 |
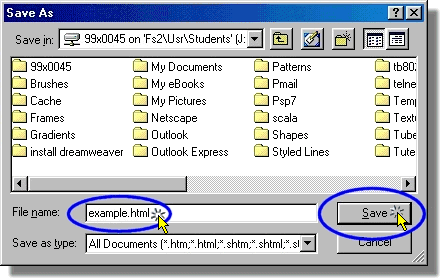
| 7 |
When naming your file use the full .html
extension – This is important, if you don't Dreamweaver will default
to an extension of .aps
–
Note: don't use spaces in file names when working with Web pages.
|
 |
Editing an existing web page
|
1
2
3
|
Start Dreamweaver UltraDev 4
Start | Programs | Macromedia Dreamweaver
UltraDev 4| Dreamweaver UltraDev 4
Maximise Dreamweaver
Close the Data Bindings floating window if it is visible.
|
|
| |
|
|
| 4 |
Select File
| Open... |
 |
| 5 |
Change to your J:\ drive.
|
|
| 6 |
Click on your J:\ drive look for your student
number |
| 7 |
Click Open |
|
Floating windows
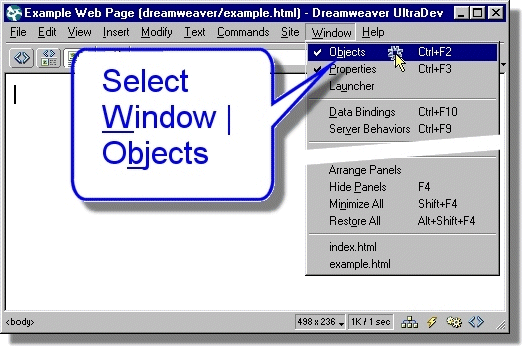
| 1 |
Select Window | Objects
Or hold down the control key
and press the F2 key
Ctrl + F2 to view the
Objects Window.
|
 |
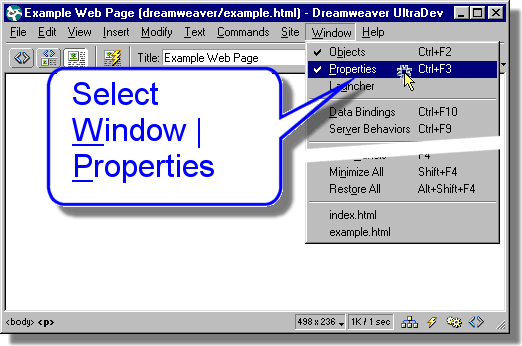
| 2 |
Select Window | Properties
Or hold down the control key
and press the F3 key
Ctrl + F3 to view the
Properties Window.
|
 |
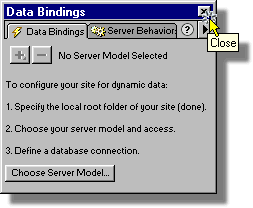
| 3 |
Close the Data Bindings floating window.
Or hold down the control key
and press the F10 key
Ctrl + F10 to close the
Data Bindings Window if it's visible.
|
 |
Inserting images
Before inserting images into web pages make sure that the image file is saved
to the J:\ drive.
Linking an image
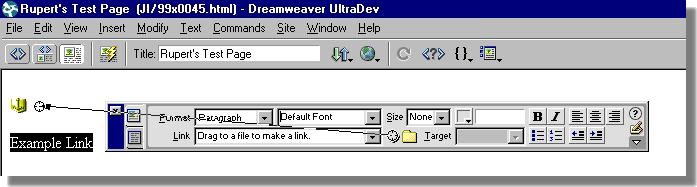
| 1 |
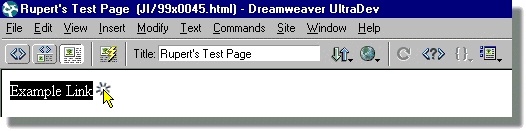
Select the image by clicking on it.
|
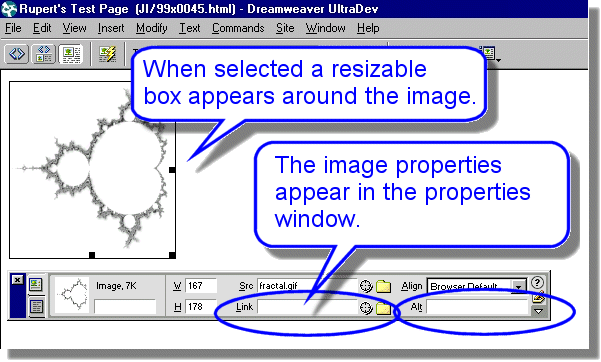 |
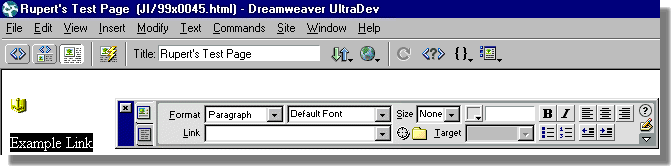
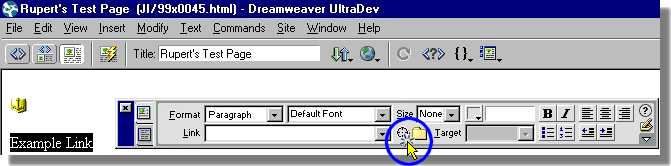
| 2 |
Click on the Link's
Brows for File folder icon. |
 |
| 3 |
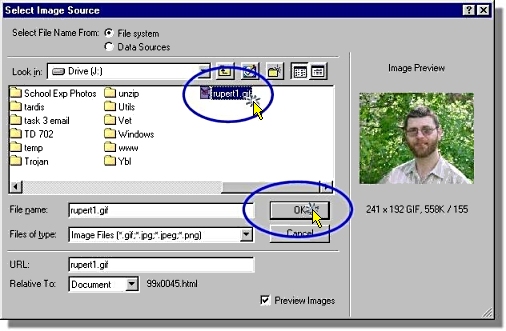
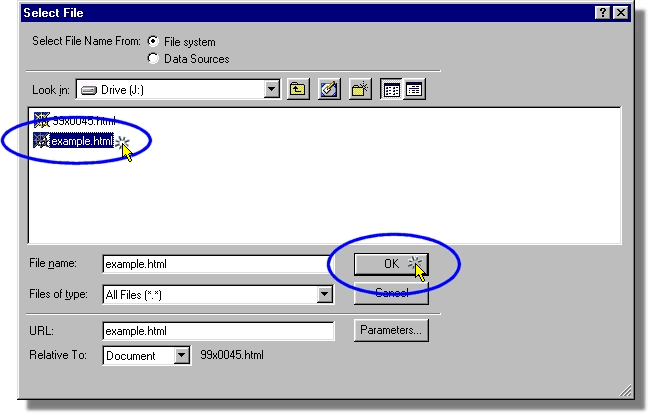
Select the file you want to link to and click OK.
Make sure that the file that you want to link to is on your J:\ drive.
If you link to a file on a floppy disk or the C:\ drive the link will
not work properly.
|
 |
| 4 |
Always give images an Alt
tag describing or naming the image |
 |
| Contents |
|
Fixing missing images
| Theory:
The most common cause of missing images is forgetting to FTP the image
file(s) along with the HTML file.
Other causes of missing images are using spaces in image file names. See
Golden
Rule number 1.
The first step in fixing a missing image is to find the name of the missing
image file.
It is easy to do this with Netscape.
|
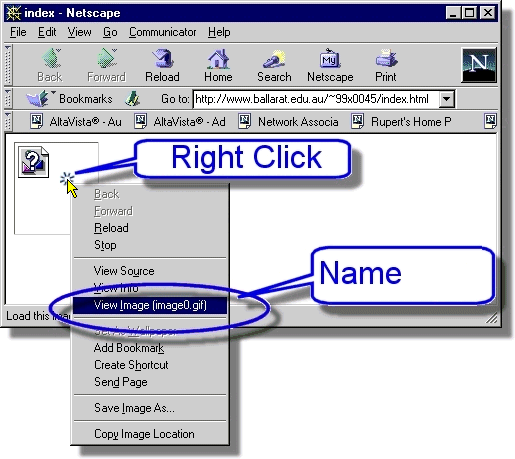
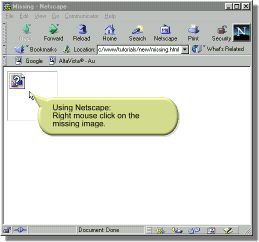
| 1 |
Right Click the mouse on the missing image.
If you are running Netscape Communicator a pop-up menu will appear.
Note the name of the missing image file.
In this example the missing image is image0.gif.
|
 |
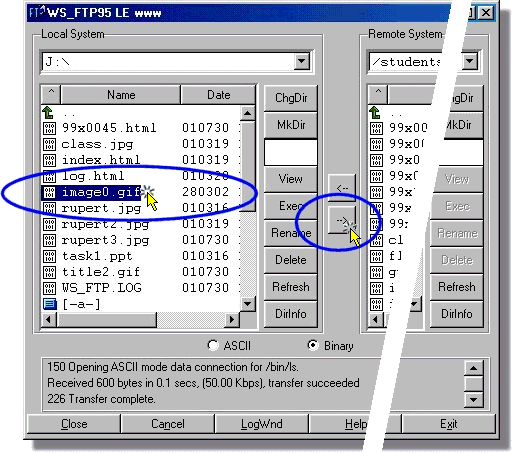
| 2 |
Start up Ws-FTP, locate the missing
file - usually this will be on the J:\
drive - and send it across to the web.
Note: If the missing image is not in your J:\ drive you will have to
copy it to J:\ reinsert it into your web page and then FTP both your new
web page & the image to the public_html folder on the Web.
Another common reasons why images may appear as missing is using spaces
in file names.
To fix this problem rename the image file removing the space, then delete
the missing image and reinsert it.
|
 |
| |
Demonstration of using Netscape to determine the name of a
missing image. |
 full
screen version
full
screen version |
Making links
| Theory:
Links are what turns the web into a Web - links are the fabric of the
web.
There are two parts to every link, the part that people see, and the
part that the computer uses.
The part that people see is usually text but can also be a picture.
The part that the computer uses is know as an address or URL -
Uniform Resource Locator.
As long as the address is valid then the link should work. The MAIN
reason links fail is because they point to an invalid address. The main
cause for invalid addresses is spaces in file names, so
DON'T USE SPACES IN FILE NAMES - when making links.
See Golden
Rule number 1.
|
Linking to a file on the J:\
drive
Theory:
Before your link will work you must save the web page, then FTP both
the web page and the file that you made the link to into the public_html
folder on the Web, see the web page
life-cycle
Always check your links to make sure they work.
The most reliable way to test a link is to ask a friend to check it
for you. This will ensure that anybody within the University community
can use your link.
|
Linking to a web page on the web
| Theory:
The most common reason why a link to a web page on the Web will fail
is that the link points to an invalid address or
– URL Uniform Resource Locator. –
The best way to prevent this is to go to the page you want to link to
using Netscape or Internet Explorer and copy the address into the clipboard.
Once you have a valid address in the clipboard you can paste the address
into the Link.
|
Contents
Inserting anchors
| Theory:
Use anchors when you want to link to a specific place in a web page.
If you want to a link at the bottom of a page to go back to the top of
the page, place an anchor at the top of the page and a link at the bottom
of the page that points to the anchor at the top.
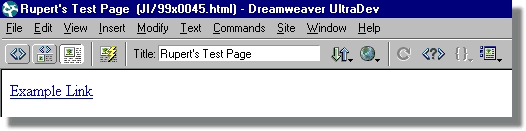
In Dreamweaver anchors look like this: 
You only see the anchor in Dreamweaver you don't see the anchor in
Netscape or Internet Explorer.
You can't test the anchor in Dreamweaver only in a browser.
Links that point to anchors use the # – hash symbol –
e.g. the following link points to an anchor at the top of this web page:
top
|
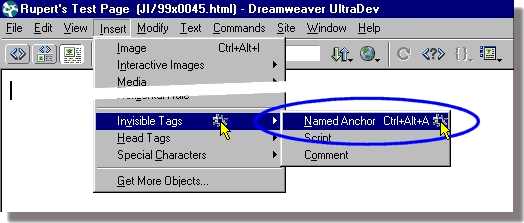
| 1 |
Place the cursor to where you want to place the anchor. |
 |
| 2 |
Select Insert | Invisible
Tags | Named Anchor
or Hold down the Ctrl key
& the Alt key and
press A – Ctrl+Alt+A –
|
 |
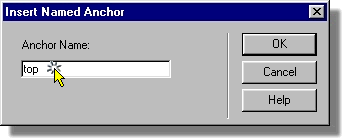
| 3 |
Enter a name for the Anchor.
Keep names short and descriptive or use numbers. e.g., top, bottom, 1,
2, 3 don't use spaces in names for anchors.
Press OK
|
 |
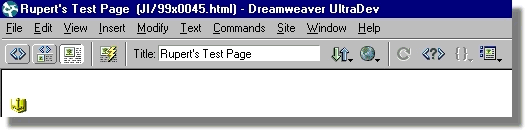
| 4 |
You should see the anchor appear in your web page.
|
 |
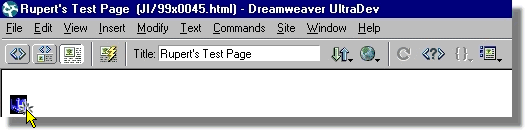
| 5 |
To view the properties of a tag select the tag.
|
 |
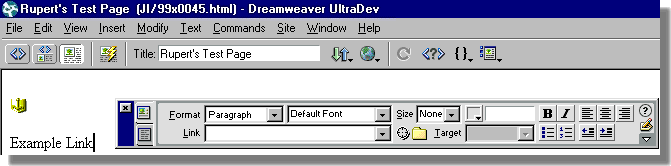
| 6 |
The anchor's properties will appear in the properties window. |
 |
Linking to anchors
| 1 |
Move the cursor to where you want the link to appear in your web page.
Type the text you want to become a link.
|
 |
| 2 |
Select the text you want to become the link – click on
the text and drag the mouse to make a selection. – |
 |
| 3 |
Click on the Target Icon. |
 |
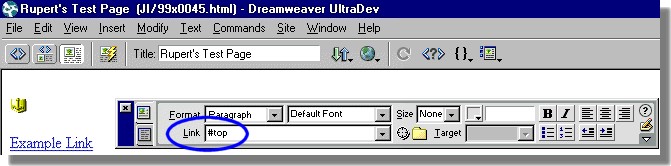
| 4 |
Drag the target to the anchor that you want to link to.
This will create a link to the anchor.
Or enter a hash followed by the name of the link. e.g. #top into the
link properties window.
|
 |
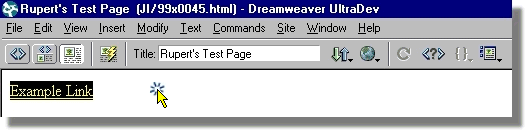
| 5 |
You should see the text turn into a link, click on the page
background to remove the selection. |
 |
| 6 |
You should see your link appear as blue underlined text. |
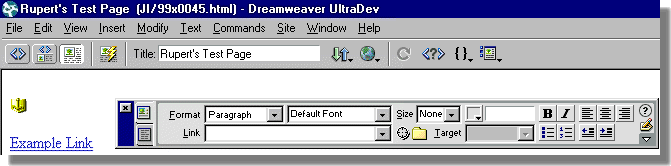 |
| 7 |
To see where a link points, click on the link and view its
properties. |
 |
Last modified: December 2, 2003

URL: http://www.rupert.id.au/tutorials/dreamweaver/index.html
APA Citation:
Russell, R. (2003, December 2). Dreamweaver ultradev notes. Retrieved December
2, 2003,
from http://www.rupert.id.au/tutorials/dreamweaver/index.html